
Sewing Tips for Mastering Difficult Techniques
Sewing Tips for Mastering Difficult Techniques
Sewing should not be difficult and overwhelming. However, most people find it challenging to sew and improve on the sewing techniques they have already learned. Overcoming the difficulties, you will face while starting your sewing journey will lead to a fun-filled and rewarding experience. Let's discuss common sewing techniques that beginners find difficult but will help improve your sewing skills.
Sewing Tips #1 French bias binding

French bias binding is usually used around collarless necks and sleeveless armholes, where facing is not wanted. This technique is a must-learn if you want to finish those areas and maintain the shape of the curve. French bias binding is not a complex technique since all you have to do is fold a piece of bias tape and sew it around the curve- without puling the curve- . Discover how you can do it easily below:
- Start by cutting a piece of fabric on the bias. Remember to cut a piece that will suit the length and width of the area where it will be sew in.
- Proceed to fold the bias strip in half with the correct side of the fabric up.
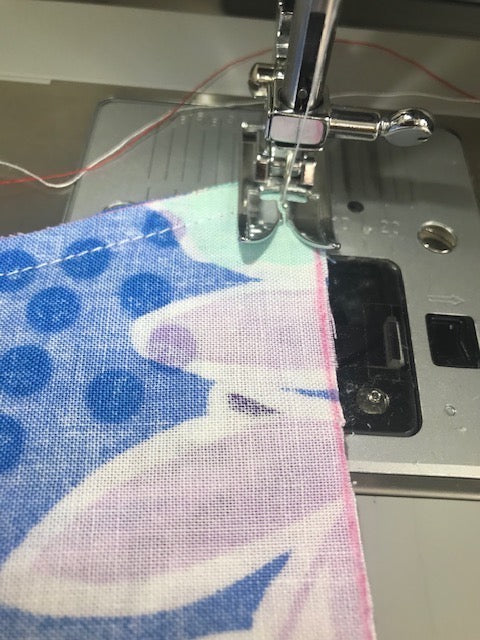
- Sew the bias tape in the correct side of the garment at ¼ seam allowance.
- Overlap the ending of the bias at shoulder line seam for necklines and underarm seams for armholes.
- With the tip of the scissor, cut small cut in the curviest area of the neckline and/ or armholes.
- Fold and press the bias to the inside of the garment.
- Hold the bias tape down with a top stitch.
- Press again.
Sewing Tips #2 Single Bias Binding

This kind of binding technique is also used to finish collarless necks and sleeveless armholes, where facing is not wanted but different from the French Bias Binding, Single Bias Binding will show in the outside of the garment and is usually done with a different fabric, so is not only finish the area where is sew but also become a design element of the garment. Here are tips for bias binding:
- Start by cutting the fabric strip to your desired width and length on the bias.
- Fold inside a 1/4 to 3/8 ( depending on the width of the bias) only in one side.
- Sew the other side of the bias tape to the neckline or armhole at ¼ or 3/8 seam allowance from the inside of the garment.
- Join the ending of the bias tape at 3/8 at shoulder line seam for necklines and underarm seams for armholes.
- With the tip of the scissor, cut small cut in the curviest area of the neckline and/ or armholes.
- Press the bias tape from the inside to the outside of the garment covering the seam allowance.
- Hold the bias tape down on the folder edge with a top stitch.
- Press again.
Sewing Tips #3 Sewing Perfect Collar Points


There are endless corners starting from 45-degree, 90-degree, and more. Collar points are popular and can be found in almost all collars. Learning how to sew a perfect collar point should not be hard if you have the tools and the skills. Discover how you can do it.
- Start by adding an extra step. This is important since it will help you create a well-sewn outside corner.
- Place your needle down and pivot across the point.
- Use two to three stitches to pivot again and follow the opposite seam.
- It is essential to maintain a shorter stitch length, about a quarter inch before and after your point.
- Trim the fabric closer to the corner to 1/8 seam allowance.
- Flit to the correct side of the fabric and press
Final Thoughts
We teach all of this sewing technique and many others during our 5-star rated course Basic Sewing here and you will continue to practice and improve them throughout our Garment Construction courses. Enroll online or in person now. For online version, please click here .